
Fun and educational Spring crafts for kids
Find a babysitter or babysitting job, or stay up to date with the latest childcare tips!
Get started today for free.
Get startedHave you noticed the subtle changes in Nature? The days get longer and warmer and the ground starts to dress up with flowers. It's time for Spring and all the fuzzy feelings that come with it. Learn how to cook healthy muffins for kids, make salt dough Spring animals and build a beehive while teaching the change of seasons and the importance of bees to your little ones!
Spring is officially here! That means that Winter is over and it's time for warmer weather. The beginning of Spring is called the Spring equinox. It's an astronomical phenomenon in which the Sun shines with greater intensity on the Earth's equatorial region, causing day and night to have exactly the same amount of time (12 hours each).
In the North side of the Earth, Spring usually starts between the 20th and the 21st of March, while on the South side it can start between the 21st and the 23rd of September. This happens because of the position of our planet regarding the Sun!

And now that you know a bit more about how Spring takes Winter's place, how about celebrating the new season with some great Spring crafts for kids and activities that they will love? Come along!
Spring activities and crafts for kids
- Salt Dough Spring Animals
- Bee Hive Craft and the Importance of Bees
- Spinach Muffins: an easy way to get your kid to eat more veggies!
Salt Dough Spring Animals
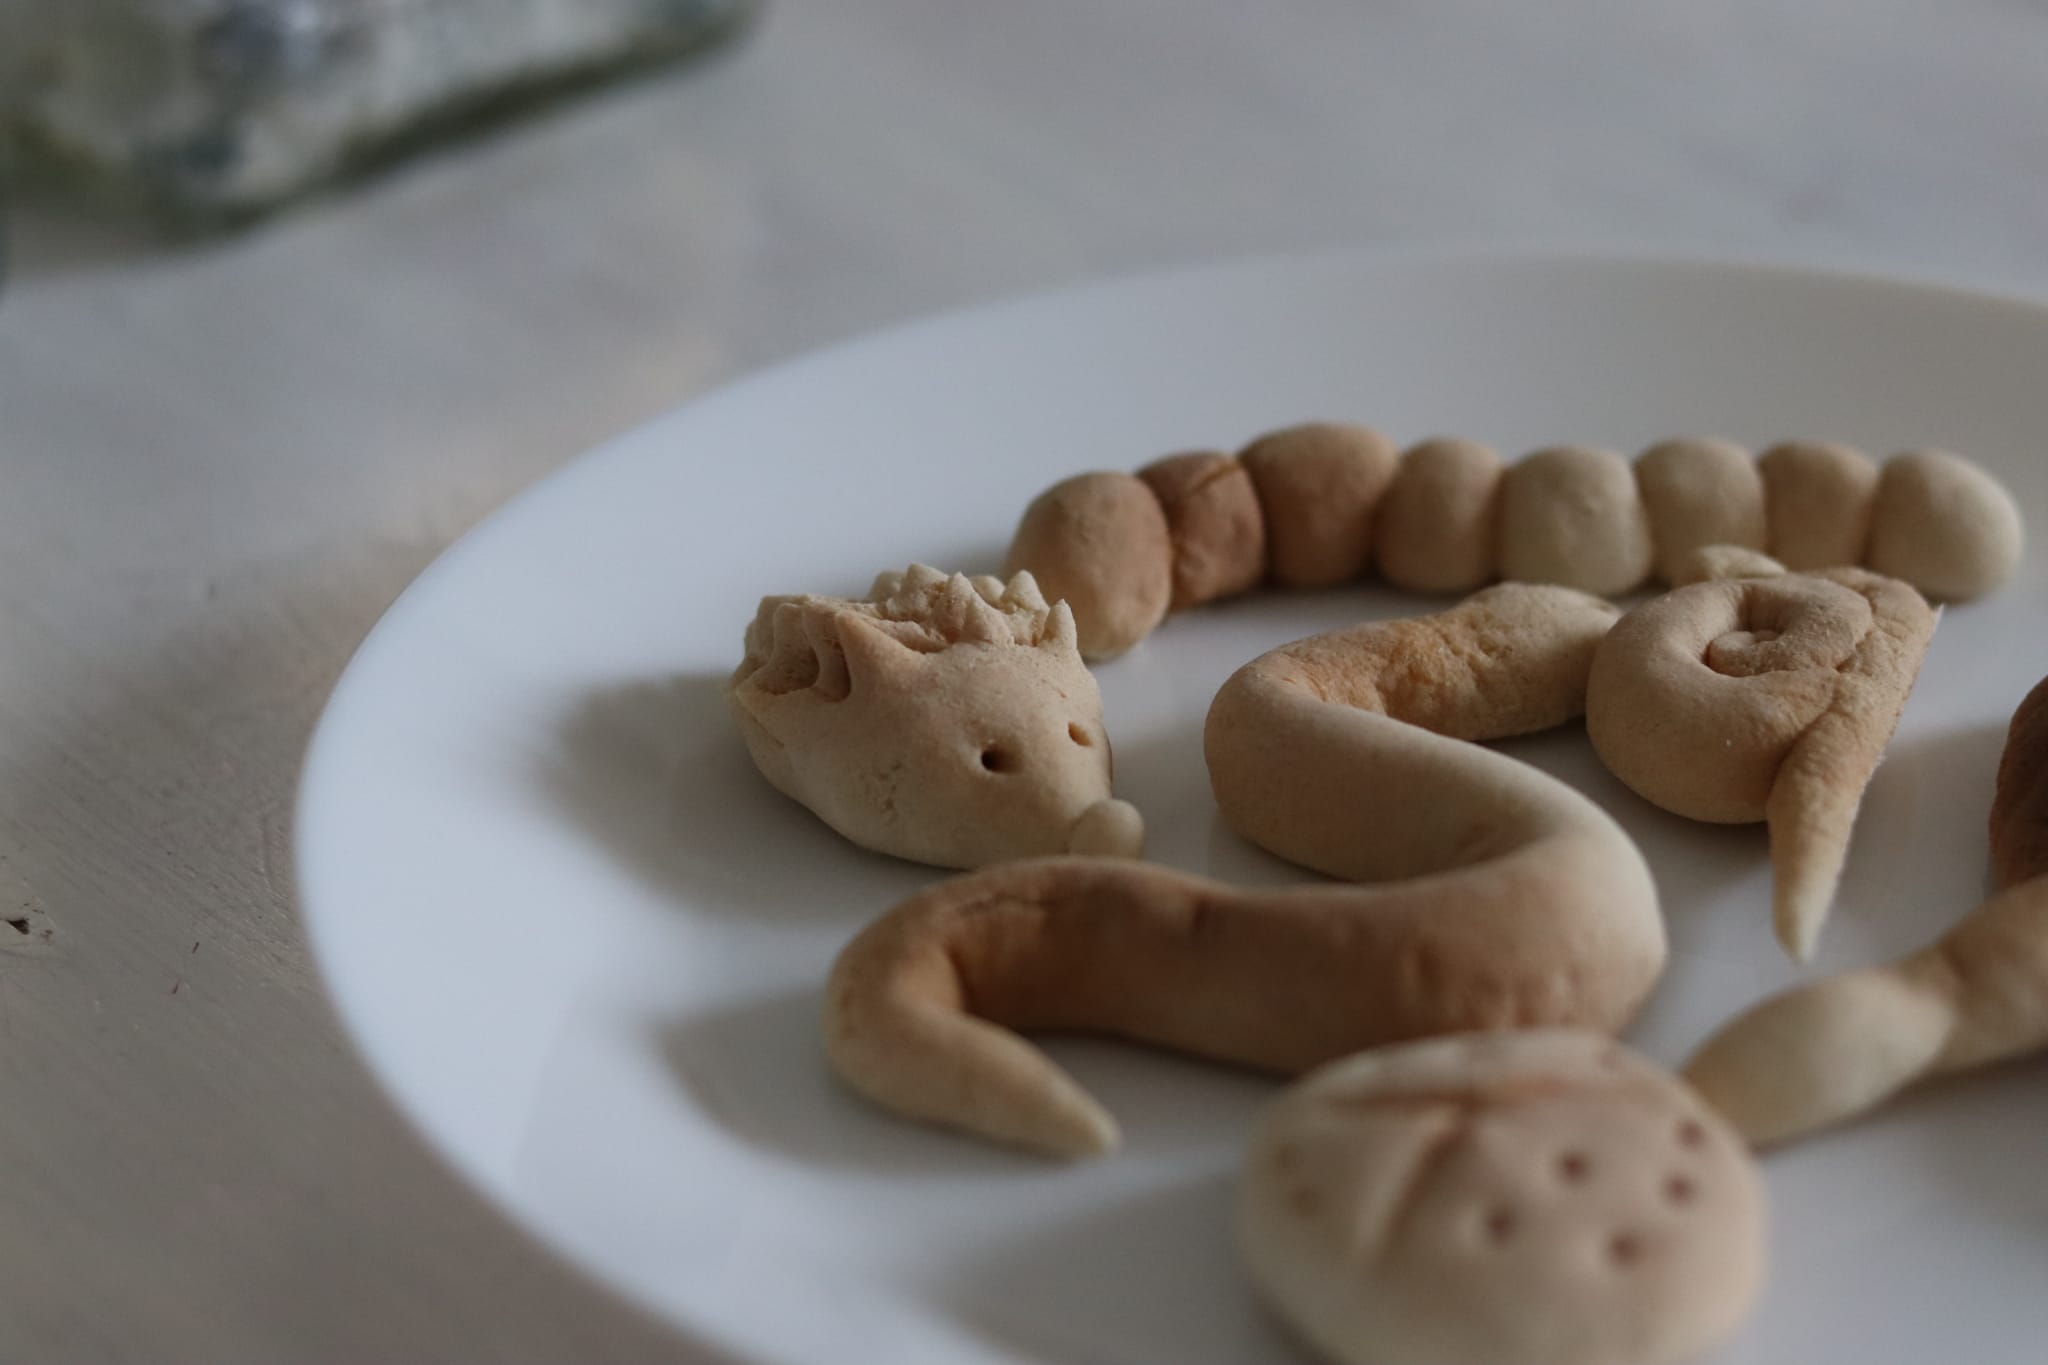
There are a lot of animals that love to come out during Spring! Butterflies, hedgehogs, ladybugs and snakes are some of the animals that start to emerge when the days get longer and warmer. Here's how you can make some using salt dough!
What will you need?
- 2 cups of flour
- 1 cup of salt
- 3/4 cups of water
- 1 tablespoon of oil
- Paint
- Brushes
Step 1

Mix all the ingredients in a bowl and work the dough until it’s smooth.
Step 2

Build your animals! We chose to make a ladybug, a dragonfly, a caterpillar, a hedgehog, a snake and snail but you can choose whatever Spring animal you'd like.
Step 3
After you shaped your Spring animals, put them in the oven for about 30 minutes 150 degrees Celsius. They should be hard after you remove them. Let them cool off for a few hours.
Step 4

After your Spring animals are cold and ready, you can start to paint them! Use the colors you like, either their real ones or more fun and unexpected combinations.

And you're done! Now you can keep these salt dough Spring animals in your room and admire how they make Spring even more beautiful!
Bee Hive Craft and the Importance of Bees
Bees are some of the most iconic animals of Spring (and of all seasons for that matter!). And Spring is the most important time of the year for bees!
During this season, the colonies get bigger as they reproduce and the bee hives get more crowded than ever. As there are more bees, there is also more honey being produced. But do you know how that happens? With so many new plants emerging, the working bees can visit more than 2000 flowers every day in order to collect nectar to feed their colony. When they store the nectar inside the bee hive, it ends up evaporating and becoming honey as we know it! Fascinating, isn't it?

Bees' main role is pollination. While collecting the delicious nectar that will feed their colony, bees transfer small grains of pollen from flower to flower, helping them reproduce faster. It has been found that about 2% of the planet's wild bees are responsible for the pollination of 80% of the world's crops. This means that, without bees, most of our food wouldn't be able to grow and both animals and humans wouldn't have enough food sources to survive. This is why bees are so important for both humans and every animal on our planet!
Now that you have the tools to teach your kid to appreciate bees instead of fearing them, how about another fun Spring activity? Come along and learn how to make a bee hive!
What will you need?
- 1 or 2 cereal boxes (depends on the size of the box and the beehive you build)
- Cardboard
- Yellow construction paper
- Black paper
- String
- Scissors
- Glue
- Tape
- Ruler
- Pencil
- Plastic eyes (optional)
Step 1

Start by cutting your cereal boxes into strips of paper. We used a ruler and pencil to make them more even and easier to work with. You will need approximately 30 to 40 strips of 3x10cm.
Step 2

Using the pencil, wrap the strips into tubes and secure them with tape. These will be your honeycombs.
Step 3

Now cut a cardboard piece into a rectangle of 26cm x 10cm. Use the ruler to measure it and divide it into five parts of 5 cm x 10 cm each, plus one part of 1 cm x 10 cm like you see in the image.
Step 4

Fold the different sections you marked on the cardboard and use the smaller section to glue everything together into a pentagon. You can use the ruler to help you fold everything more easily.
Step 5

Fill the pentagon with the tubes you just created. Your work is starting to look like a beehive!
Step 6

Now it's time to add some color! Cut the yellow construction paper into the same size as your piece of cardboard: 26 cm x 10 cm. Glue it all around your beehive.
Step 7

Decorate your bee house! Cut some thin strips of black paper and glue it around the pentagon. You can also glue or draw eyes so that your beehive really resembles a bee! Tie a string around the upper side of the beehive so you can hang it wherever you want to.

Your bee hive is ready! Hang it outside and see if your local bees would like to occupy it or just inside of your room as Spring decoration!
Spinach Muffins: an easy way to get your kid to eat more veggies!
Does your kid struggle to eat vegetables? These flower-shaped spinach muffins might just be the solution for that!
They’re not only a beautiful vibrant shade of green, but they are also super tasty and easily customizable: you can add bananas and other fruits for extra vitamins, or chocolate chips for added deliciousness!
Ingredients
The ingredients are simple, just like the process:
- Self-rising flour (350g)
- Fresh spinach (250g)
- Sunflower oil (100ml)
- Sugar (200 g)
- Vanilla extract
- Eggs (3)
Step 1
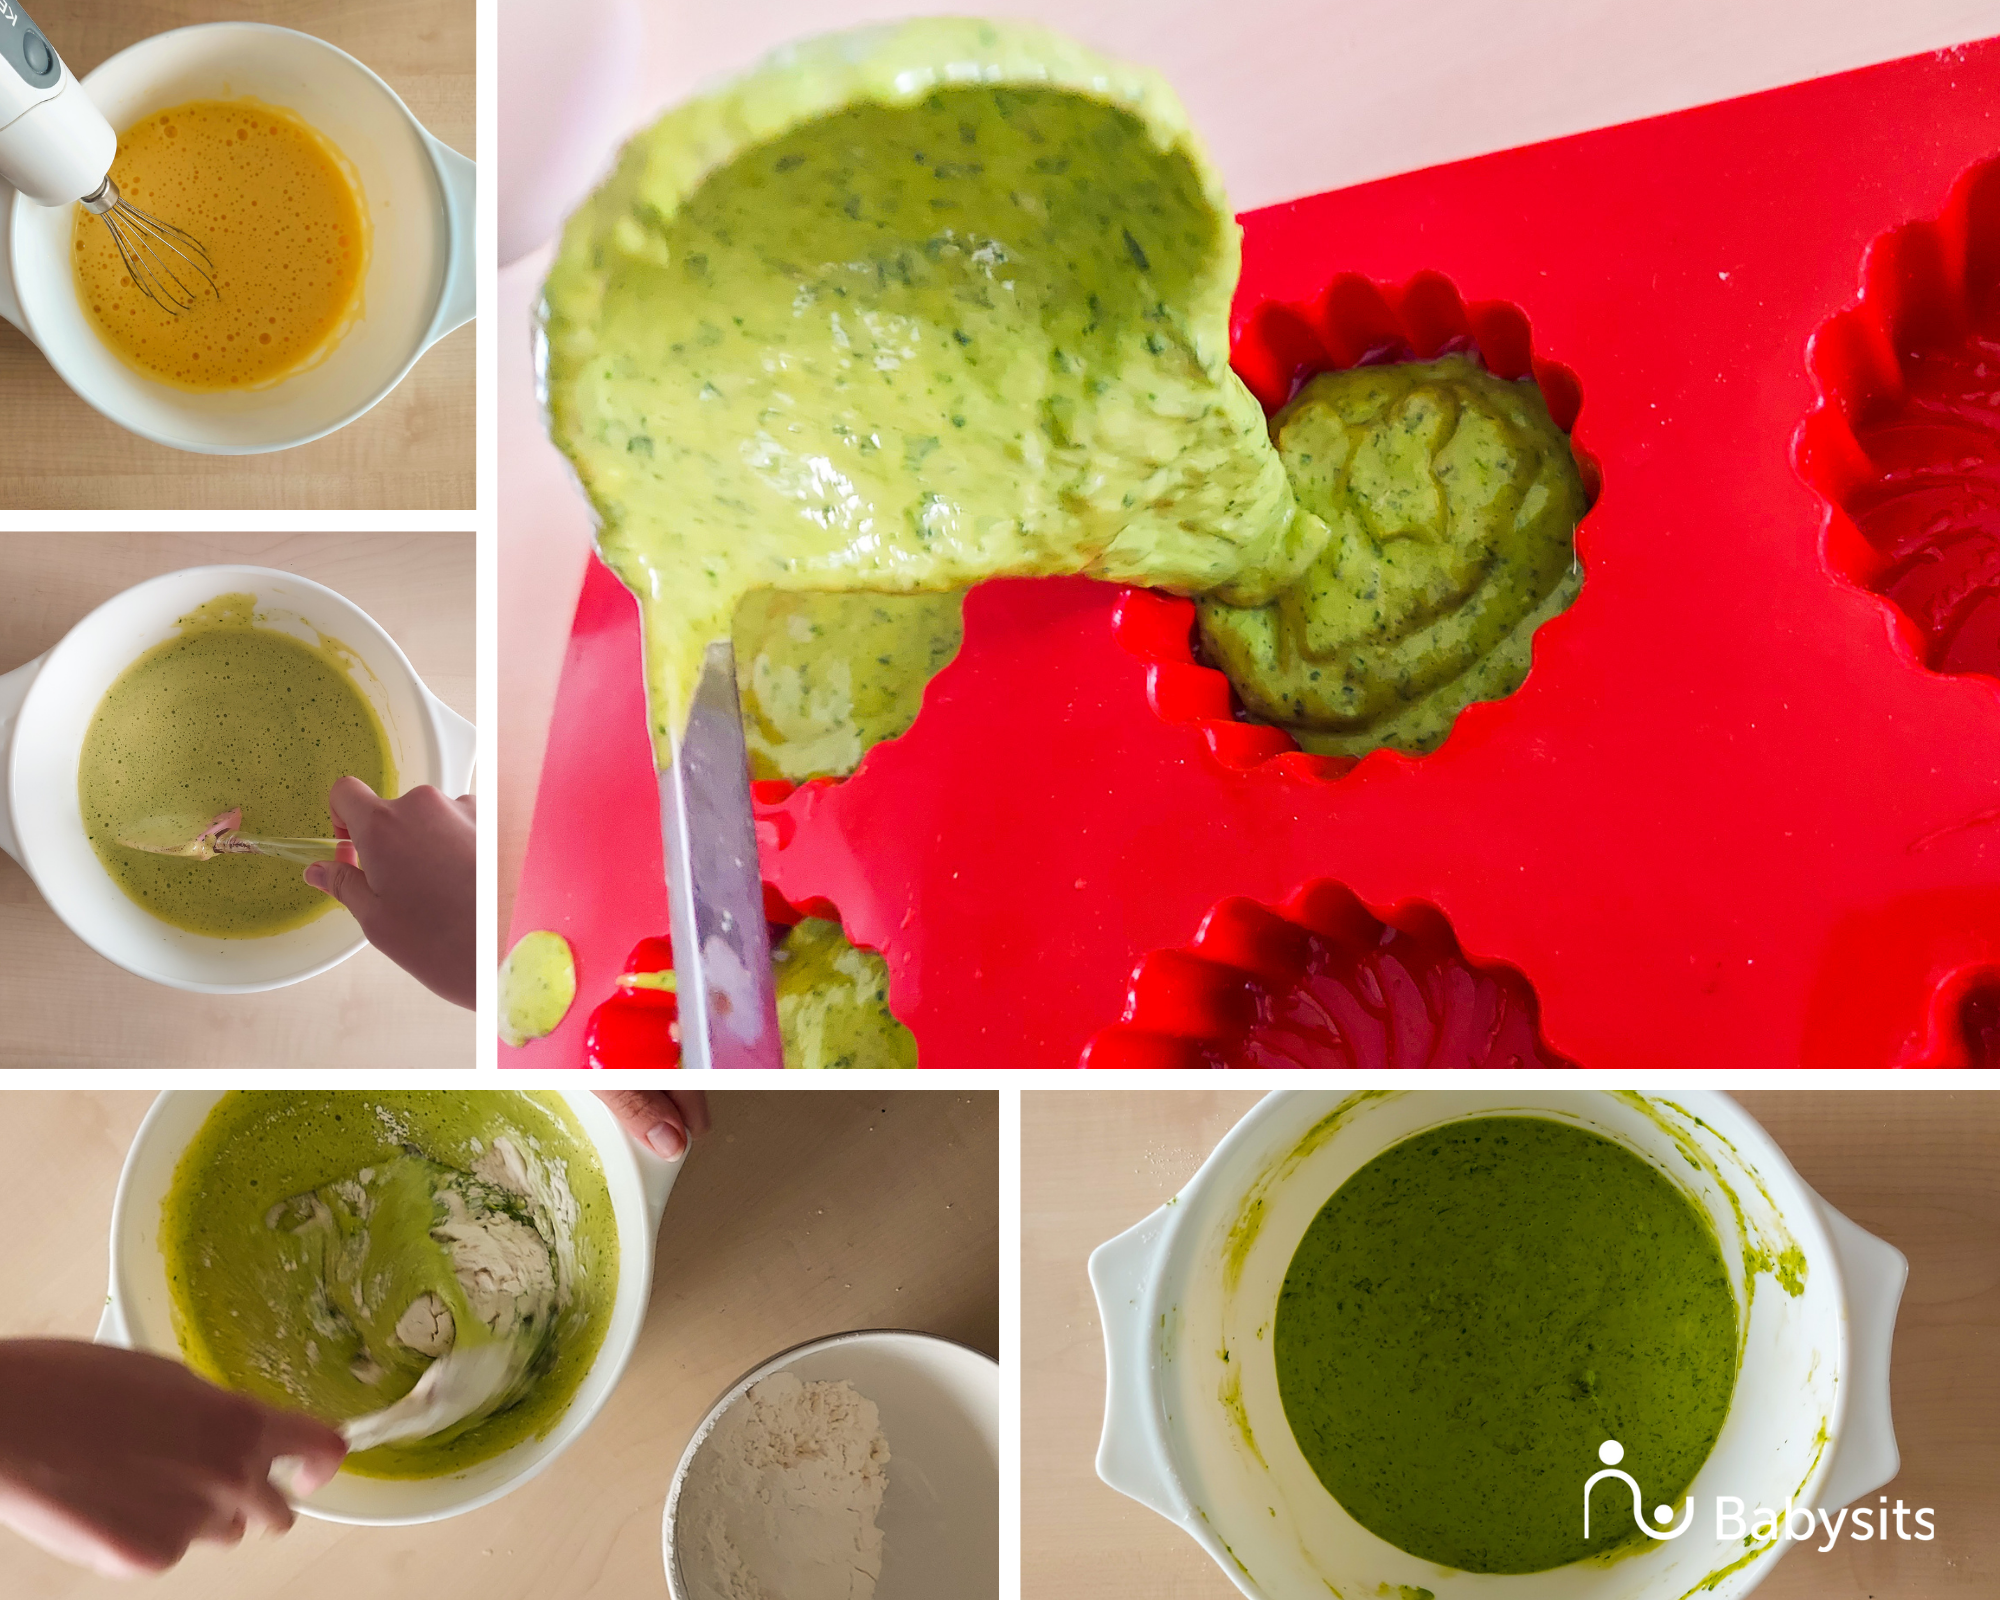
Whisk the eggs with the sugar and vanilla extract until foamy.
Dip the spinach in boiling water for about one minute, drain and blend, and finally add to the egg mixture.
Step 2
Add the sunflower oil.
Sift the flour and slowly mix it with the rest until you reach a pancake-like consistency.
Step 3
Take a ladle or a spoon and divide the mixture into generously oiled muffin moulds.
Step 4
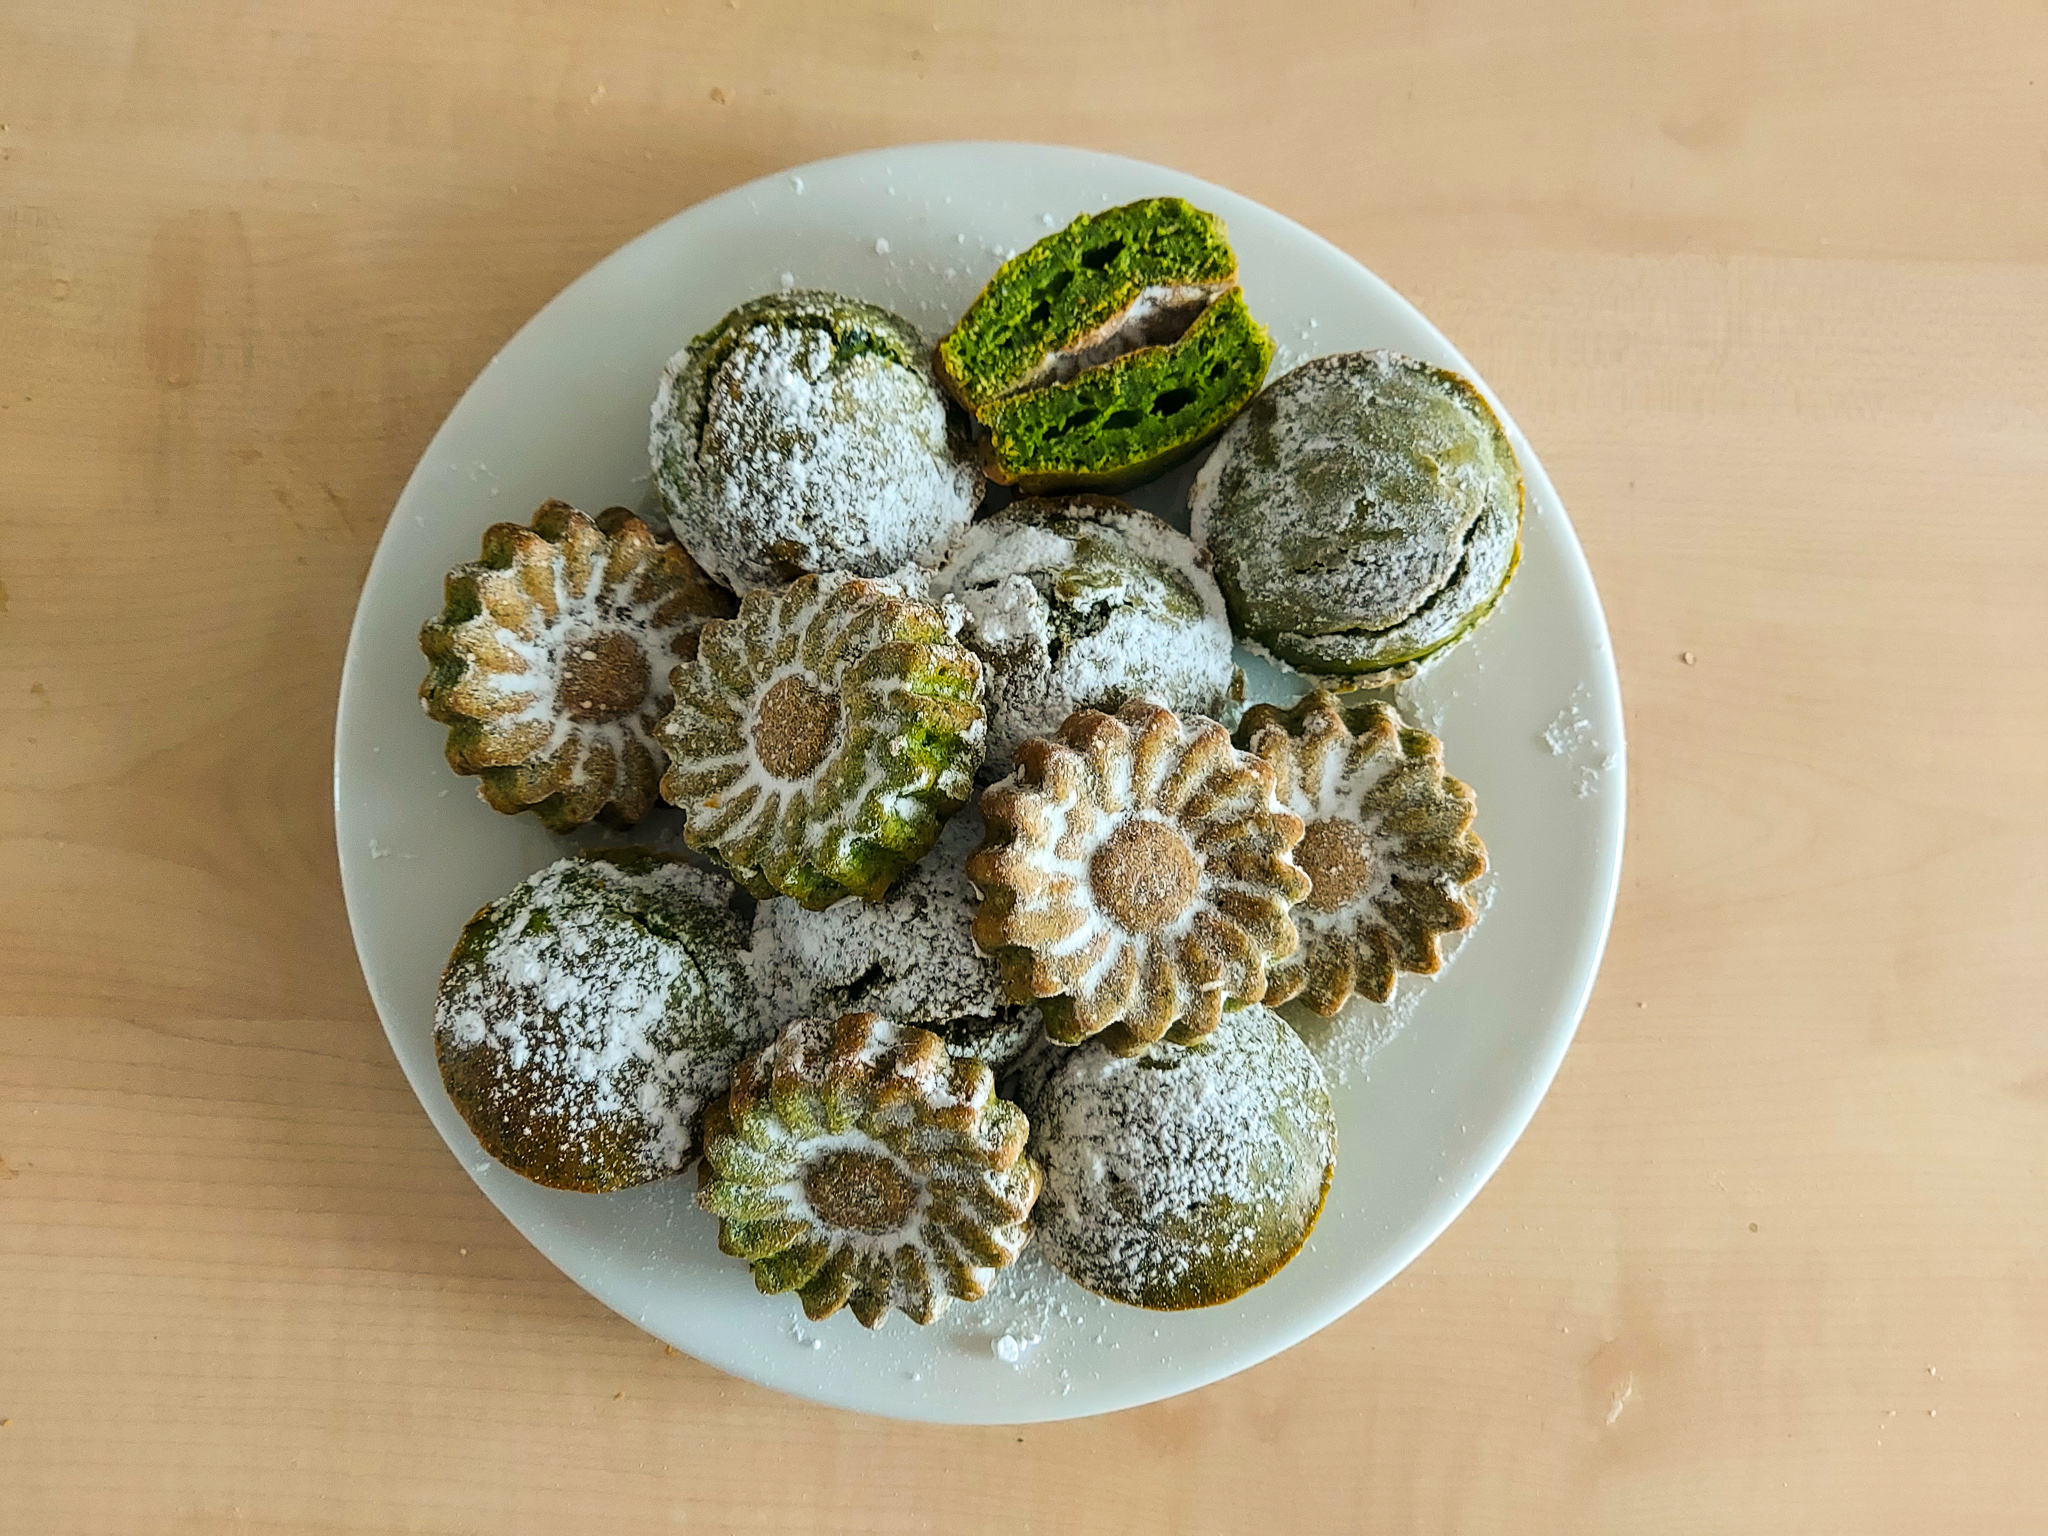
Bake in a preheated oven at 180°C for about 15 minutes or until brown on the outside.
Step 5
Wait until cool and sprinkle powdered sugar on top. Enjoy!
With the weather getting warmer, you can take all of these activities outside! Enjoy nature with your kids and make sure to look into other ideas for outdoor activities with kids that we have on our Community Resources. Happy Spring!